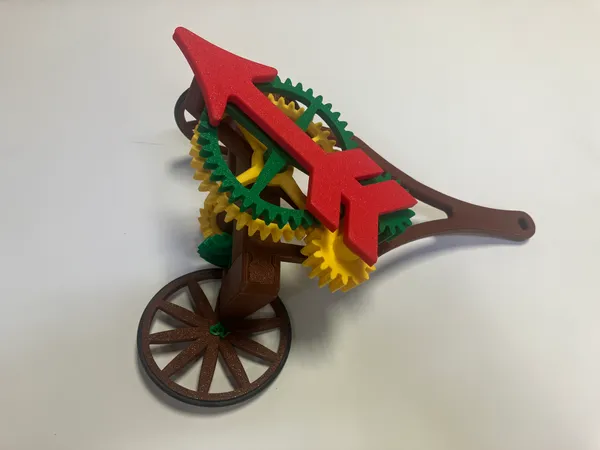
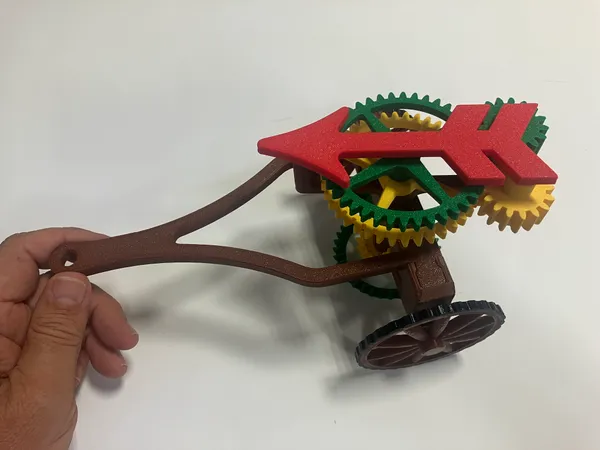
South-pointing Chariot Updates
Improved Axles
The South-pointing Chariot I released in August of last year was initially designed with vertically-printed axles. My hunch at the time was that these would be too weak. I decided to try the idea anyway and was delightfully surprised at how strong they actually were, so I published it.
Alas, within a few weeks the lower gear and wheels did snap off a few times. I should’ve listened to my instinct in the first place! I updated the design and am finally getting around to publishing it.
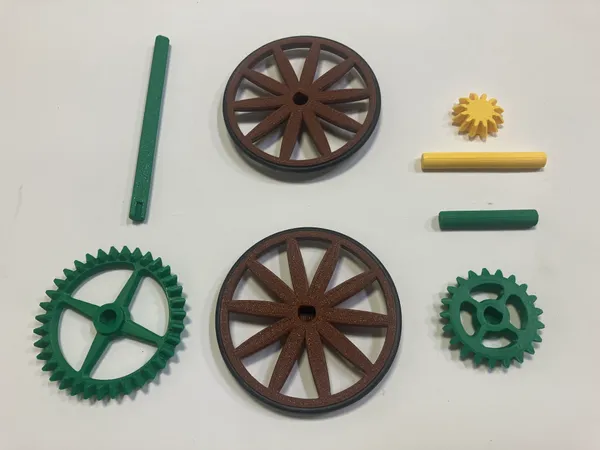
The axles have a flat spot on one side which should face down for printing. The horizontal orientation makes them much stronger, and the flat spot has no effect on rotation.
The gears and wheels now have holes to match, so the parts listed on each line below must be replaced as a set.
- left axle, left bevel gear, wheel
- right axle, right bevel gear, wheel
- lower bevel gear, vertical axle
If you’re building a new chariot, I strongly recommend this upgrade. If you’ve already built the original, I would not bother with the upgrade until something breaks. Then, reprint these replacements as needed.
I had to use a bit more glue for this version. The axles must be mounted square to the gears. Glue carefully, turning the axles to check alignment before the glue sets. Do the same with the wheels.
TPU Tires
Another idea I originally had was to experiment with TPU for tires. But another maker, @kriswillcode, on Printables.com beat me to it!
Click here for the design files on Printables.com
I had assumed that TPU tires would also require a change to the wheels, but these were designed to fit onto the original wheels. It’s a terrific upgrade if you already have some TPU filament!
I had designed some tires as well, but redesigned them to fit the original wheels after seeing those by @kriswillcode. Mine have a slightly different tread, and are the correct outer diameter, though you’d probably never notice any difference. Choose whichever you like best!
TPU filament is available in several hardness variants. I used some with a shore hardness of 95A, which seems to be the most common. This is slightly harder than the O-rings, which are 70, if I’m reading the specs aright. They do not grip smooth surfaces quite as well as the O-rings, but for most surfaces they work great. Thanks @kriswillcode for your contribution!
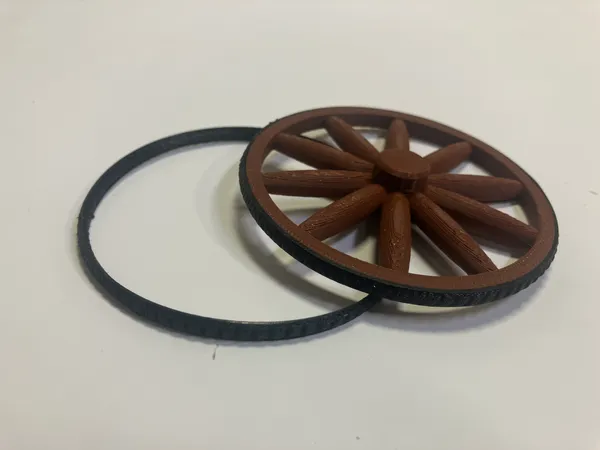
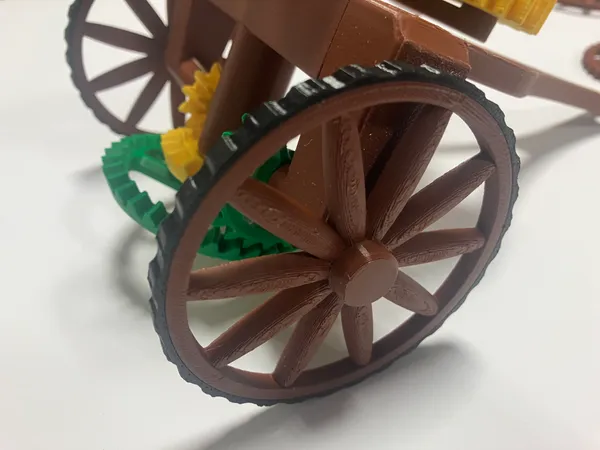
Rubber Band Tires
These are sized to take a #64 rubberband, which is supposed to be 3 1/2" (unstretched) by 1/4" or about 90mm x 6mm.[1] Mine are closer to 5mm wide but still work fine. To make the tread a bit thicker you can add two bands, one atop the other.
Take some time to get the band on band on straight and even. The rubber seems to grip most surfaces at least as well as the original O-ring; maybe better.
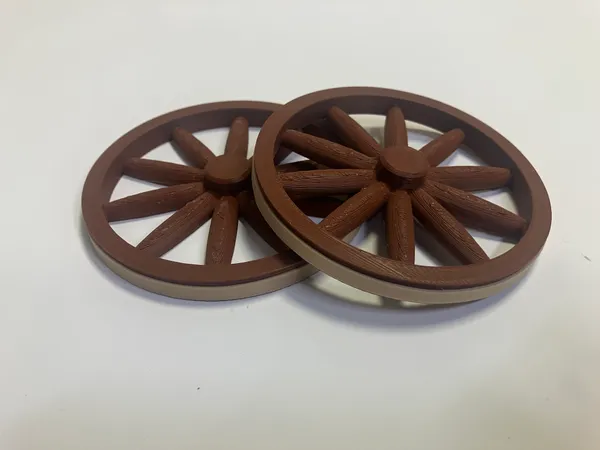
Wheels for Soft Surfaces

If you demonstrate your chariot on a soft surface like carpeting or a tablecloth, you can get away with these all-plastic wheels. These make assembly simpler, but don’t work quite as well on smooth tabletops or floors.
Try the upgrades yourself
I’ve created a new page on Printables.com containing the new files. For convenience of those building their first chariot, it includes all necessary files. If you’re upgrading, you’ll only need the files listed above. This time around, I’ve added the files to Thingiverse as well.
And, as before, the CAD source files are available on my Github page.
Rubber band size info: https://www.bouncerubberbands.com/news/the-ultimate-guide-to-rubber-band-sizes ↩︎